The preparations for Tourney season carried on against Cal
and a formidable beast heavy list.
* Exemplar Errant Officer & Standard Bearer
Knights Exemplar (Leader and 5 Grunts)
Knights Exemplar (Leader and 5 Grunts)
Visgoth Juviah Rhoven & 2 Honor Guard
Exemplar Errant Seneschal
High Exemplar Gravus
Knight Exemplar Seneschal
Knight Exemplar Seneschal
 Cal won the roll-off and decided to go first. eDoomy sat in
the centre flanked by Troll Moses and Janissa with the Runeshapers in front.
Cal placed the Mauler, Mulg and the Pyre facing my right flank and the
Earthborn and Axer facing my left.
Cal won the roll-off and decided to go first. eDoomy sat in
the centre flanked by Troll Moses and Janissa with the Runeshapers in front.
Cal placed the Mauler, Mulg and the Pyre facing my right flank and the
Earthborn and Axer facing my left.
 I set up with a front line of Bastions and both units of
Knights (the Knights looking to make an early claim for the right hand control
zone). eKreoss, FoS, Rhoven and Co and both Knight Sennys standing behind. The
Errants, Errant Senny and Daughters Advance Deployed near the forest looking to
take the left hand control zone.
I set up with a front line of Bastions and both units of
Knights (the Knights looking to make an early claim for the right hand control
zone). eKreoss, FoS, Rhoven and Co and both Knight Sennys standing behind. The
Errants, Errant Senny and Daughters Advance Deployed near the forest looking to
take the left hand control zone.

 Kreoss goes first and puts Inviolable Resolve and Sacrosanct
on the Knights (I forgot to use their Advance Move, probably just as well).
Both sets of Knights run forward towards the control zone just about getting a
toe in. The Bastions also run forward to try and clog up the middle of the
field. The Daughters drift in from the left to the centre to see what the
Runeshapers would do, While the Errants got cosy in the forest contesting the
zone.
Kreoss goes first and puts Inviolable Resolve and Sacrosanct
on the Knights (I forgot to use their Advance Move, probably just as well).
Both sets of Knights run forward towards the control zone just about getting a
toe in. The Bastions also run forward to try and clog up the middle of the
field. The Daughters drift in from the left to the centre to see what the
Runeshapers would do, While the Errants got cosy in the forest contesting the
zone.
Turn 2
 The fun began when Cal brought on his reinforcements. The
first Scout unit deployed at the front of the reinforcement deployment zone,
with the second unit just behind them. The first unit activated and Assaulted
the Errants and made quite a big dent in their numbers (six Errants kicked the
bucket), while the second Scout unit moved up in support. Cal’s next action was
to get Moses to use Harmonious Exaltation on Doomy who had upkept his spells
and feated. The Runeshapers move forward and try to blast the Daughters but can
only kill one. The Earthborn, who had Rush cast on him by Doomy, charges into
the Bastions taking three down, leaving the remaining two on one wound each.
The Axer follows suit and threshers three Daughters. Having seen what was
happening on the other side of the table, the Mauler decided to get in on the
action and charge the Knights. This charge, thankfully, failed by the closest
of margins. Mulg moved closer to the Control Zone and Janissa threw down a Rock
Wall in front of the Pyre and Mulg. The Pyre also tried to Spew at the Knights
but couldn’t cause any harm or make the fire stick due to eKreoss’ Elite Cadre:
Aegis.
The fun began when Cal brought on his reinforcements. The
first Scout unit deployed at the front of the reinforcement deployment zone,
with the second unit just behind them. The first unit activated and Assaulted
the Errants and made quite a big dent in their numbers (six Errants kicked the
bucket), while the second Scout unit moved up in support. Cal’s next action was
to get Moses to use Harmonious Exaltation on Doomy who had upkept his spells
and feated. The Runeshapers move forward and try to blast the Daughters but can
only kill one. The Earthborn, who had Rush cast on him by Doomy, charges into
the Bastions taking three down, leaving the remaining two on one wound each.
The Axer follows suit and threshers three Daughters. Having seen what was
happening on the other side of the table, the Mauler decided to get in on the
action and charge the Knights. This charge, thankfully, failed by the closest
of margins. Mulg moved closer to the Control Zone and Janissa threw down a Rock
Wall in front of the Pyre and Mulg. The Pyre also tried to Spew at the Knights
but couldn’t cause any harm or make the fire stick due to eKreoss’ Elite Cadre:
Aegis.
 After a big turn from Cal, it was time for a big turn from
me. I brought on my Reinforcements and deployed them as far as they could go.
Kreoss kicked things off allocating one Focus to FoS and upkeeping his upkeeps.
He moved forward and then feated (everybody auto-hits and get an extra attack
each) keeping hold of the rest of his Focus. I started with the Bastions and
charged the Axer. Credit goes to the Axer for staying alive on two points after
four Weapon Master attacks. One of my Knights Senny (now with STR buff for
Menites dying nearby) charged the Earthborn getting off his Chain Attack. This
caused a lot of damage. Gravus (full up with souls of fallen Menites – love
that double dipping) charged in and finished off the Earthborn. Rhoven moved up
with his Honor Guard and used Negation to take a point of Fury away from the
Axer (not that it made much difference to Doomy). The Errants struck back at
the Scouts killing three from the closest unit and two from the other, their
Quick Work ability not working to full effect). The two remaining Daughters ran
past the Axer and took on the Runeshapers taking killing two with a total of
six attacks. I tried to squeeze as many Knights around the Mauler as I could
but failed as I so very nearly killed the big troll. In the end, the Cleansers
had to pitch in with their sprays to kill the Mauler.
After a big turn from Cal, it was time for a big turn from
me. I brought on my Reinforcements and deployed them as far as they could go.
Kreoss kicked things off allocating one Focus to FoS and upkeeping his upkeeps.
He moved forward and then feated (everybody auto-hits and get an extra attack
each) keeping hold of the rest of his Focus. I started with the Bastions and
charged the Axer. Credit goes to the Axer for staying alive on two points after
four Weapon Master attacks. One of my Knights Senny (now with STR buff for
Menites dying nearby) charged the Earthborn getting off his Chain Attack. This
caused a lot of damage. Gravus (full up with souls of fallen Menites – love
that double dipping) charged in and finished off the Earthborn. Rhoven moved up
with his Honor Guard and used Negation to take a point of Fury away from the
Axer (not that it made much difference to Doomy). The Errants struck back at
the Scouts killing three from the closest unit and two from the other, their
Quick Work ability not working to full effect). The two remaining Daughters ran
past the Axer and took on the Runeshapers taking killing two with a total of
six attacks. I tried to squeeze as many Knights around the Mauler as I could
but failed as I so very nearly killed the big troll. In the end, the Cleansers
had to pitch in with their sprays to kill the Mauler.
Turn 3
 Cal started off with the easy bit and got his scouts to
finish off the Errants and gain the first control point of the game (we both
thought that I had score the first but after looking at the wording in the
Steamroller pack, I only contested the zone as I had less than half the Errants
in the zone). The Axer, who still had Wild Aggression upkept, then managed to
kill the Knight Senny in front of him. Fortunately, Cal forgot about
Restoration so the Senny came back after some nearby Knights were killed. The
last Runeshaper ignored the Daughters in front of him and tried in vain to kill
a Knight. Janissa showed him how it was done by killing two (and not getting
knocked down from Sacrosanct like we thought as she was Steady). The Pyre activated
next and knowing he was going to do didly-squat to the Knights, he gave his
animus to Mulg to make him hit far harder than he should (in my opinion
anyway). Mulg then did what he does best and SMASH!!! He took out a handful of
Knights to clear some space.
Cal started off with the easy bit and got his scouts to
finish off the Errants and gain the first control point of the game (we both
thought that I had score the first but after looking at the wording in the
Steamroller pack, I only contested the zone as I had less than half the Errants
in the zone). The Axer, who still had Wild Aggression upkept, then managed to
kill the Knight Senny in front of him. Fortunately, Cal forgot about
Restoration so the Senny came back after some nearby Knights were killed. The
last Runeshaper ignored the Daughters in front of him and tried in vain to kill
a Knight. Janissa showed him how it was done by killing two (and not getting
knocked down from Sacrosanct like we thought as she was Steady). The Pyre activated
next and knowing he was going to do didly-squat to the Knights, he gave his
animus to Mulg to make him hit far harder than he should (in my opinion
anyway). Mulg then did what he does best and SMASH!!! He took out a handful of
Knights to clear some space.
 Time for me to get a bit of a move on before I was wiped out
by Mulg so I kicked off with Rhoven who got his Guard to charge the Axer to
finally finish it off. Gravus gets a charge in on the Scouts and kills three,
clearing the control zone as a result (I would score my first point at the end
of the turn). I then charge one of the Daughters into Troll Moses while the
other stays engaged with the Runeshaper. Unfortunately, they are unable to kill
either Troll. The Knights then get charges in on the Pyre and the Whelp that is
standing right next to Mulg. The Whelp dies, but the Pyre hangs on with a few
points left. I then get the other Knight Senny at Mulg. Both initial attacks
hit but I then fail with the Combo: Smite attack. Finally I bring in the Cleansers
to start spraying Mulg, careful not to hit my guys. They pile on a bit more
damage.
Time for me to get a bit of a move on before I was wiped out
by Mulg so I kicked off with Rhoven who got his Guard to charge the Axer to
finally finish it off. Gravus gets a charge in on the Scouts and kills three,
clearing the control zone as a result (I would score my first point at the end
of the turn). I then charge one of the Daughters into Troll Moses while the
other stays engaged with the Runeshaper. Unfortunately, they are unable to kill
either Troll. The Knights then get charges in on the Pyre and the Whelp that is
standing right next to Mulg. The Whelp dies, but the Pyre hangs on with a few
points left. I then get the other Knight Senny at Mulg. Both initial attacks
hit but I then fail with the Combo: Smite attack. Finally I bring in the Cleansers
to start spraying Mulg, careful not to hit my guys. They pile on a bit more
damage.
 The Knights Senny, Errant Senny and Gravus combine to kill
three out of the four Scouts left on the board, the last one contesting the
control zone. The Daughters finish off Moses and puts a few points of damage on
Janissa. FoS gets a hit on Mulg causing a few points. The Knights charge the
last Runeshaper (killing him), Mulg (more damage) and Doomy (left with only a
few points but still with a couple of transfers). I then get the Cleansers to
activate and half start spraying Mulg taking a few points at a time until they
kill him and the rest spray Doomy with the same result.
The Knights Senny, Errant Senny and Gravus combine to kill
three out of the four Scouts left on the board, the last one contesting the
control zone. The Daughters finish off Moses and puts a few points of damage on
Janissa. FoS gets a hit on Mulg causing a few points. The Knights charge the
last Runeshaper (killing him), Mulg (more damage) and Doomy (left with only a
few points but still with a couple of transfers). I then get the Cleansers to
activate and half start spraying Mulg taking a few points at a time until they
kill him and the rest spray Doomy with the same result.
The negative streak ends after an EPIC three and a bit hour,
four turn game. I really enjoyed using reinforcements, they really changed the
game. Cal’s choice of two units of Scouts was genius, coming on and making sure
that things died with their Assault moves made my trusty Errants look quite
flimsy. My Cleansers made quite an impact too. It had been a while since I last
used them and enjoyed the extra dimension that the Officer (just purchased
hours before the game) lent to them. My feat turn would not have been quite as
devastating as it was if the charge of the Mauler had not failed, the Cleansers
and others would have had to work that little bit harder. Everything in my list
worked quite well. The Daughters get special mention despite losing four very
early, they didn’t need to use Anatomical Precision that much to take down Cal’s
support. The best thing about Rhoven was not his abilities which are quite
situational at times, but it was his guard. Two MAT 8 Weapon Masters!!! If something
needs to be taken down, Cassian and Gius can really make sure it is either done
or make it easier for others to finish off. Kreoss was safe and FoS wasn’t
really in any position to cause much harm, although he saved himself with his
Dispel attack on Mulg.
(EPIC!) Hoarluk Doomshaper, Rage of Dhunia
* Pyre Troll
* Troll Axer
* Dire Troll Mauler
* Earthborn Dire Troll
* Mulg the Ancient
* Trollkin Runebearer
Trollkin Runeshapers (Leader and 2 Crew)
Janissa Stonetide
Troll Whelps
Troll Whelps
* Pyre Troll
* Troll Axer
* Dire Troll Mauler
* Earthborn Dire Troll
* Mulg the Ancient
* Trollkin Runebearer
Trollkin Runeshapers (Leader and 2 Crew)
Janissa Stonetide
Troll Whelps
Troll Whelps
Reinforcements:
Trollkin Scouts (Leader and 5 Grunts)
Trollkin Scouts (Leader and 5 Grunts)
Trollkin Scouts (Leader and 5 Grunts)
I was originally going to take eFeora to give her her debut
but Dark Sphere didn’t have the model for me to buy (or that I didn’t think her
list would pack enough punch against what was likely to be a beast heavy list).
So I went with a variation of my eKreoss list:
Grand Exemplar (EPIC!) Kreoss
* Fire of Salvation
Daughters of the Flame (Leader and 5 Grunts)
Exemplar Bastions (Leader and 4 Grunts)
Exemplar Errants (Leader and 9 Grunts)* Fire of Salvation
Daughters of the Flame (Leader and 5 Grunts)
Exemplar Bastions (Leader and 4 Grunts)
* Exemplar Errant Officer & Standard Bearer
Knights Exemplar (Leader and 5 Grunts)
Knights Exemplar (Leader and 5 Grunts)
Visgoth Juviah Rhoven & 2 Honor Guard
Exemplar Errant Seneschal
High Exemplar Gravus
Knight Exemplar Seneschal
Knight Exemplar Seneschal
Reinforcements:
Flameguard Cleansers (Leader and 9 Grunts)
* Flameguard Cleanser Officer
* Flameguard Cleanser Officer
We drew up the scenario for the game which was Outflank,
Outfight and Outflank with Reinforcements. Neither Cal nor I had gotten to use
the Reinforcement rule yet so this was going to be a lot of fun.
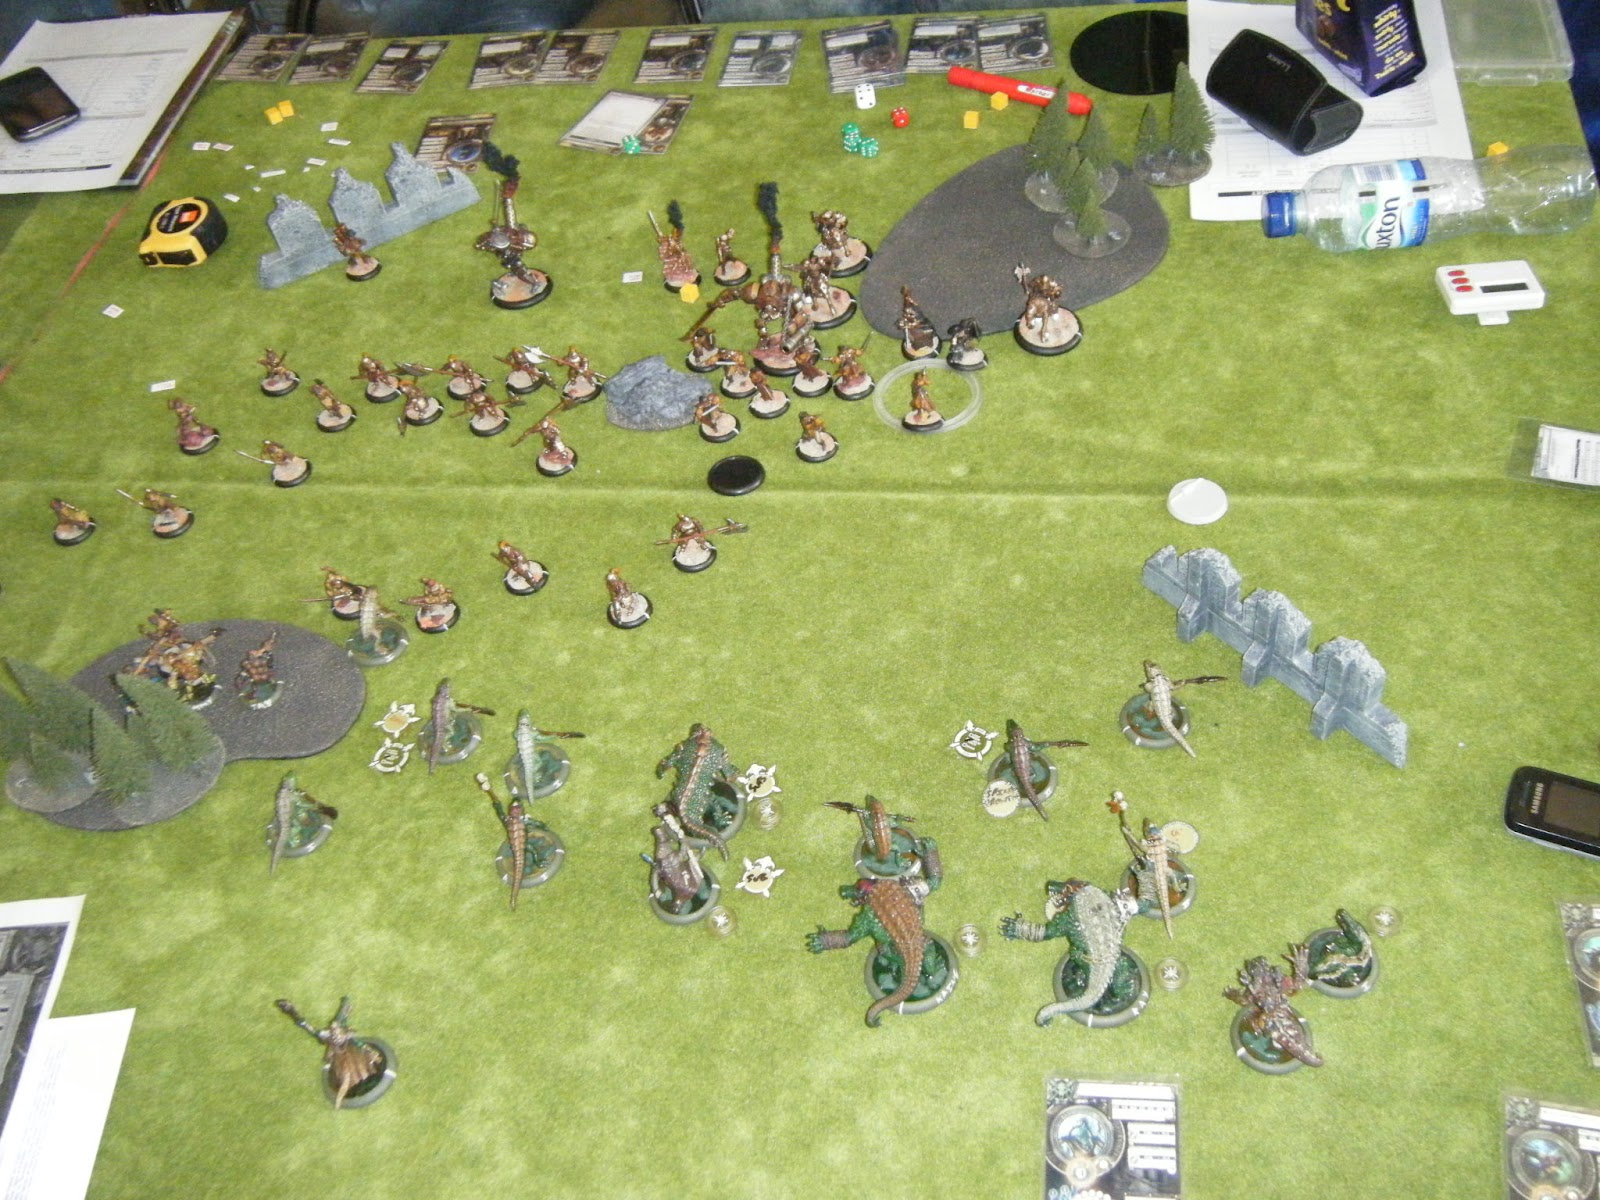
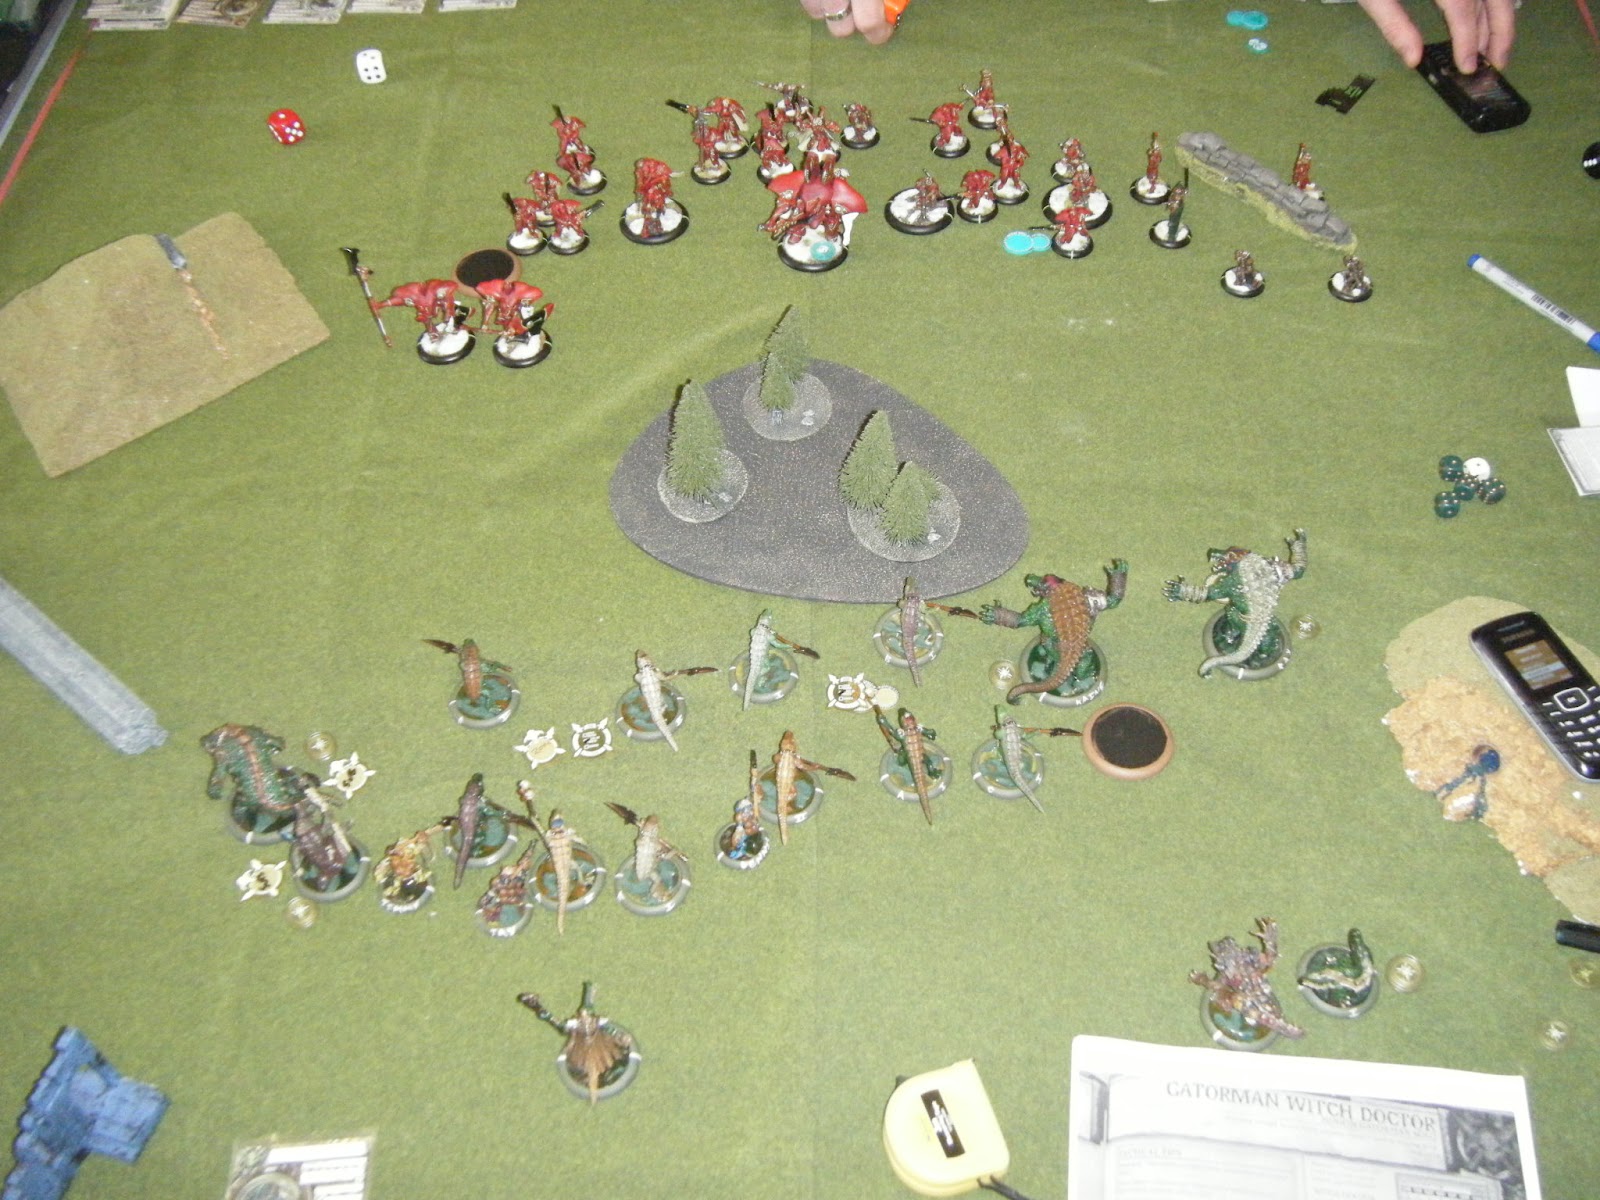
 Cal won the roll-off and decided to go first. eDoomy sat in
the centre flanked by Troll Moses and Janissa with the Runeshapers in front.
Cal placed the Mauler, Mulg and the Pyre facing my right flank and the
Earthborn and Axer facing my left.
Cal won the roll-off and decided to go first. eDoomy sat in
the centre flanked by Troll Moses and Janissa with the Runeshapers in front.
Cal placed the Mauler, Mulg and the Pyre facing my right flank and the
Earthborn and Axer facing my left. I set up with a front line of Bastions and both units of
Knights (the Knights looking to make an early claim for the right hand control
zone). eKreoss, FoS, Rhoven and Co and both Knight Sennys standing behind. The
Errants, Errant Senny and Daughters Advance Deployed near the forest looking to
take the left hand control zone.
I set up with a front line of Bastions and both units of
Knights (the Knights looking to make an early claim for the right hand control
zone). eKreoss, FoS, Rhoven and Co and both Knight Sennys standing behind. The
Errants, Errant Senny and Daughters Advance Deployed near the forest looking to
take the left hand control zone.
Turn1

Cal ran everything forward as one with the exception of
Doomy who threw Wild Aggression on the Earthborn and Refuge on the Pyre.
 Kreoss goes first and puts Inviolable Resolve and Sacrosanct
on the Knights (I forgot to use their Advance Move, probably just as well).
Both sets of Knights run forward towards the control zone just about getting a
toe in. The Bastions also run forward to try and clog up the middle of the
field. The Daughters drift in from the left to the centre to see what the
Runeshapers would do, While the Errants got cosy in the forest contesting the
zone.
Kreoss goes first and puts Inviolable Resolve and Sacrosanct
on the Knights (I forgot to use their Advance Move, probably just as well).
Both sets of Knights run forward towards the control zone just about getting a
toe in. The Bastions also run forward to try and clog up the middle of the
field. The Daughters drift in from the left to the centre to see what the
Runeshapers would do, While the Errants got cosy in the forest contesting the
zone.Turn 2
 The fun began when Cal brought on his reinforcements. The
first Scout unit deployed at the front of the reinforcement deployment zone,
with the second unit just behind them. The first unit activated and Assaulted
the Errants and made quite a big dent in their numbers (six Errants kicked the
bucket), while the second Scout unit moved up in support. Cal’s next action was
to get Moses to use Harmonious Exaltation on Doomy who had upkept his spells
and feated. The Runeshapers move forward and try to blast the Daughters but can
only kill one. The Earthborn, who had Rush cast on him by Doomy, charges into
the Bastions taking three down, leaving the remaining two on one wound each.
The Axer follows suit and threshers three Daughters. Having seen what was
happening on the other side of the table, the Mauler decided to get in on the
action and charge the Knights. This charge, thankfully, failed by the closest
of margins. Mulg moved closer to the Control Zone and Janissa threw down a Rock
Wall in front of the Pyre and Mulg. The Pyre also tried to Spew at the Knights
but couldn’t cause any harm or make the fire stick due to eKreoss’ Elite Cadre:
Aegis.
The fun began when Cal brought on his reinforcements. The
first Scout unit deployed at the front of the reinforcement deployment zone,
with the second unit just behind them. The first unit activated and Assaulted
the Errants and made quite a big dent in their numbers (six Errants kicked the
bucket), while the second Scout unit moved up in support. Cal’s next action was
to get Moses to use Harmonious Exaltation on Doomy who had upkept his spells
and feated. The Runeshapers move forward and try to blast the Daughters but can
only kill one. The Earthborn, who had Rush cast on him by Doomy, charges into
the Bastions taking three down, leaving the remaining two on one wound each.
The Axer follows suit and threshers three Daughters. Having seen what was
happening on the other side of the table, the Mauler decided to get in on the
action and charge the Knights. This charge, thankfully, failed by the closest
of margins. Mulg moved closer to the Control Zone and Janissa threw down a Rock
Wall in front of the Pyre and Mulg. The Pyre also tried to Spew at the Knights
but couldn’t cause any harm or make the fire stick due to eKreoss’ Elite Cadre:
Aegis. After a big turn from Cal, it was time for a big turn from
me. I brought on my Reinforcements and deployed them as far as they could go.
Kreoss kicked things off allocating one Focus to FoS and upkeeping his upkeeps.
He moved forward and then feated (everybody auto-hits and get an extra attack
each) keeping hold of the rest of his Focus. I started with the Bastions and
charged the Axer. Credit goes to the Axer for staying alive on two points after
four Weapon Master attacks. One of my Knights Senny (now with STR buff for
Menites dying nearby) charged the Earthborn getting off his Chain Attack. This
caused a lot of damage. Gravus (full up with souls of fallen Menites – love
that double dipping) charged in and finished off the Earthborn. Rhoven moved up
with his Honor Guard and used Negation to take a point of Fury away from the
Axer (not that it made much difference to Doomy). The Errants struck back at
the Scouts killing three from the closest unit and two from the other, their
Quick Work ability not working to full effect). The two remaining Daughters ran
past the Axer and took on the Runeshapers taking killing two with a total of
six attacks. I tried to squeeze as many Knights around the Mauler as I could
but failed as I so very nearly killed the big troll. In the end, the Cleansers
had to pitch in with their sprays to kill the Mauler.
After a big turn from Cal, it was time for a big turn from
me. I brought on my Reinforcements and deployed them as far as they could go.
Kreoss kicked things off allocating one Focus to FoS and upkeeping his upkeeps.
He moved forward and then feated (everybody auto-hits and get an extra attack
each) keeping hold of the rest of his Focus. I started with the Bastions and
charged the Axer. Credit goes to the Axer for staying alive on two points after
four Weapon Master attacks. One of my Knights Senny (now with STR buff for
Menites dying nearby) charged the Earthborn getting off his Chain Attack. This
caused a lot of damage. Gravus (full up with souls of fallen Menites – love
that double dipping) charged in and finished off the Earthborn. Rhoven moved up
with his Honor Guard and used Negation to take a point of Fury away from the
Axer (not that it made much difference to Doomy). The Errants struck back at
the Scouts killing three from the closest unit and two from the other, their
Quick Work ability not working to full effect). The two remaining Daughters ran
past the Axer and took on the Runeshapers taking killing two with a total of
six attacks. I tried to squeeze as many Knights around the Mauler as I could
but failed as I so very nearly killed the big troll. In the end, the Cleansers
had to pitch in with their sprays to kill the Mauler.Turn 3
 Cal started off with the easy bit and got his scouts to
finish off the Errants and gain the first control point of the game (we both
thought that I had score the first but after looking at the wording in the
Steamroller pack, I only contested the zone as I had less than half the Errants
in the zone). The Axer, who still had Wild Aggression upkept, then managed to
kill the Knight Senny in front of him. Fortunately, Cal forgot about
Restoration so the Senny came back after some nearby Knights were killed. The
last Runeshaper ignored the Daughters in front of him and tried in vain to kill
a Knight. Janissa showed him how it was done by killing two (and not getting
knocked down from Sacrosanct like we thought as she was Steady). The Pyre activated
next and knowing he was going to do didly-squat to the Knights, he gave his
animus to Mulg to make him hit far harder than he should (in my opinion
anyway). Mulg then did what he does best and SMASH!!! He took out a handful of
Knights to clear some space.
Cal started off with the easy bit and got his scouts to
finish off the Errants and gain the first control point of the game (we both
thought that I had score the first but after looking at the wording in the
Steamroller pack, I only contested the zone as I had less than half the Errants
in the zone). The Axer, who still had Wild Aggression upkept, then managed to
kill the Knight Senny in front of him. Fortunately, Cal forgot about
Restoration so the Senny came back after some nearby Knights were killed. The
last Runeshaper ignored the Daughters in front of him and tried in vain to kill
a Knight. Janissa showed him how it was done by killing two (and not getting
knocked down from Sacrosanct like we thought as she was Steady). The Pyre activated
next and knowing he was going to do didly-squat to the Knights, he gave his
animus to Mulg to make him hit far harder than he should (in my opinion
anyway). Mulg then did what he does best and SMASH!!! He took out a handful of
Knights to clear some space. Time for me to get a bit of a move on before I was wiped out
by Mulg so I kicked off with Rhoven who got his Guard to charge the Axer to
finally finish it off. Gravus gets a charge in on the Scouts and kills three,
clearing the control zone as a result (I would score my first point at the end
of the turn). I then charge one of the Daughters into Troll Moses while the
other stays engaged with the Runeshaper. Unfortunately, they are unable to kill
either Troll. The Knights then get charges in on the Pyre and the Whelp that is
standing right next to Mulg. The Whelp dies, but the Pyre hangs on with a few
points left. I then get the other Knight Senny at Mulg. Both initial attacks
hit but I then fail with the Combo: Smite attack. Finally I bring in the Cleansers
to start spraying Mulg, careful not to hit my guys. They pile on a bit more
damage.
Time for me to get a bit of a move on before I was wiped out
by Mulg so I kicked off with Rhoven who got his Guard to charge the Axer to
finally finish it off. Gravus gets a charge in on the Scouts and kills three,
clearing the control zone as a result (I would score my first point at the end
of the turn). I then charge one of the Daughters into Troll Moses while the
other stays engaged with the Runeshaper. Unfortunately, they are unable to kill
either Troll. The Knights then get charges in on the Pyre and the Whelp that is
standing right next to Mulg. The Whelp dies, but the Pyre hangs on with a few
points left. I then get the other Knight Senny at Mulg. Both initial attacks
hit but I then fail with the Combo: Smite attack. Finally I bring in the Cleansers
to start spraying Mulg, careful not to hit my guys. They pile on a bit more
damage.
Turn 4 (queue missing pic for Cal's turn 4)
With both Mulg and the Pyre maxed out on Fury, Cal has to
decide which beast is going to frenzy. He goes for Pyre who has the most
uninspiring frenzy and fails to kill what’s in front of him. The Scouts make
charge moves at the Errant Senny and Gravus. The Senny stands unscathed while
Gravus only suffers five points of damage. Moses uses Harmonious Exaltation on
Doomy who pimps his friend Mulg with Wild Aggression and the Pyre’s Flame
Fists. This does not look good for FoS. Janissa then uses Tectonic Shift and
moves both Daughters and the two Knights engaging the Pyre towards my table
edge. Then Mulg goes for it. He Threshers both the FoS and the Knight Senny,
causing FoS to lose two columns and kills the Senny. This activates FoS’s
Righteous Vengeance. FoS moves in and whacks Mulg. Because of his Affinity with
Kreoss, his weapons have Dispel meaning Mulg is now just normal Mulg. Mulg
carries on buying attacks and leaves FoS with only his left arm (Open Fist) in
working order.
 The Knights Senny, Errant Senny and Gravus combine to kill
three out of the four Scouts left on the board, the last one contesting the
control zone. The Daughters finish off Moses and puts a few points of damage on
Janissa. FoS gets a hit on Mulg causing a few points. The Knights charge the
last Runeshaper (killing him), Mulg (more damage) and Doomy (left with only a
few points but still with a couple of transfers). I then get the Cleansers to
activate and half start spraying Mulg taking a few points at a time until they
kill him and the rest spray Doomy with the same result.
The Knights Senny, Errant Senny and Gravus combine to kill
three out of the four Scouts left on the board, the last one contesting the
control zone. The Daughters finish off Moses and puts a few points of damage on
Janissa. FoS gets a hit on Mulg causing a few points. The Knights charge the
last Runeshaper (killing him), Mulg (more damage) and Doomy (left with only a
few points but still with a couple of transfers). I then get the Cleansers to
activate and half start spraying Mulg taking a few points at a time until they
kill him and the rest spray Doomy with the same result.
All in all, I’m satisfied with my eKreoss list and not sure
if I should change it to accommodate for a second unit of Daughters or not. I
may not get to much time to test this out as I really should begin working with
Feora (p or e) and Vindictus.